🛡️ Permissions
Hello there! Welcome to the permission guide on how to set-up Open Ticket permissions without problems!
It's recommended that you have a basic knowledge about the discord developer portal before starting with this guide.

Permissions
Setting up Open Ticket permissions.
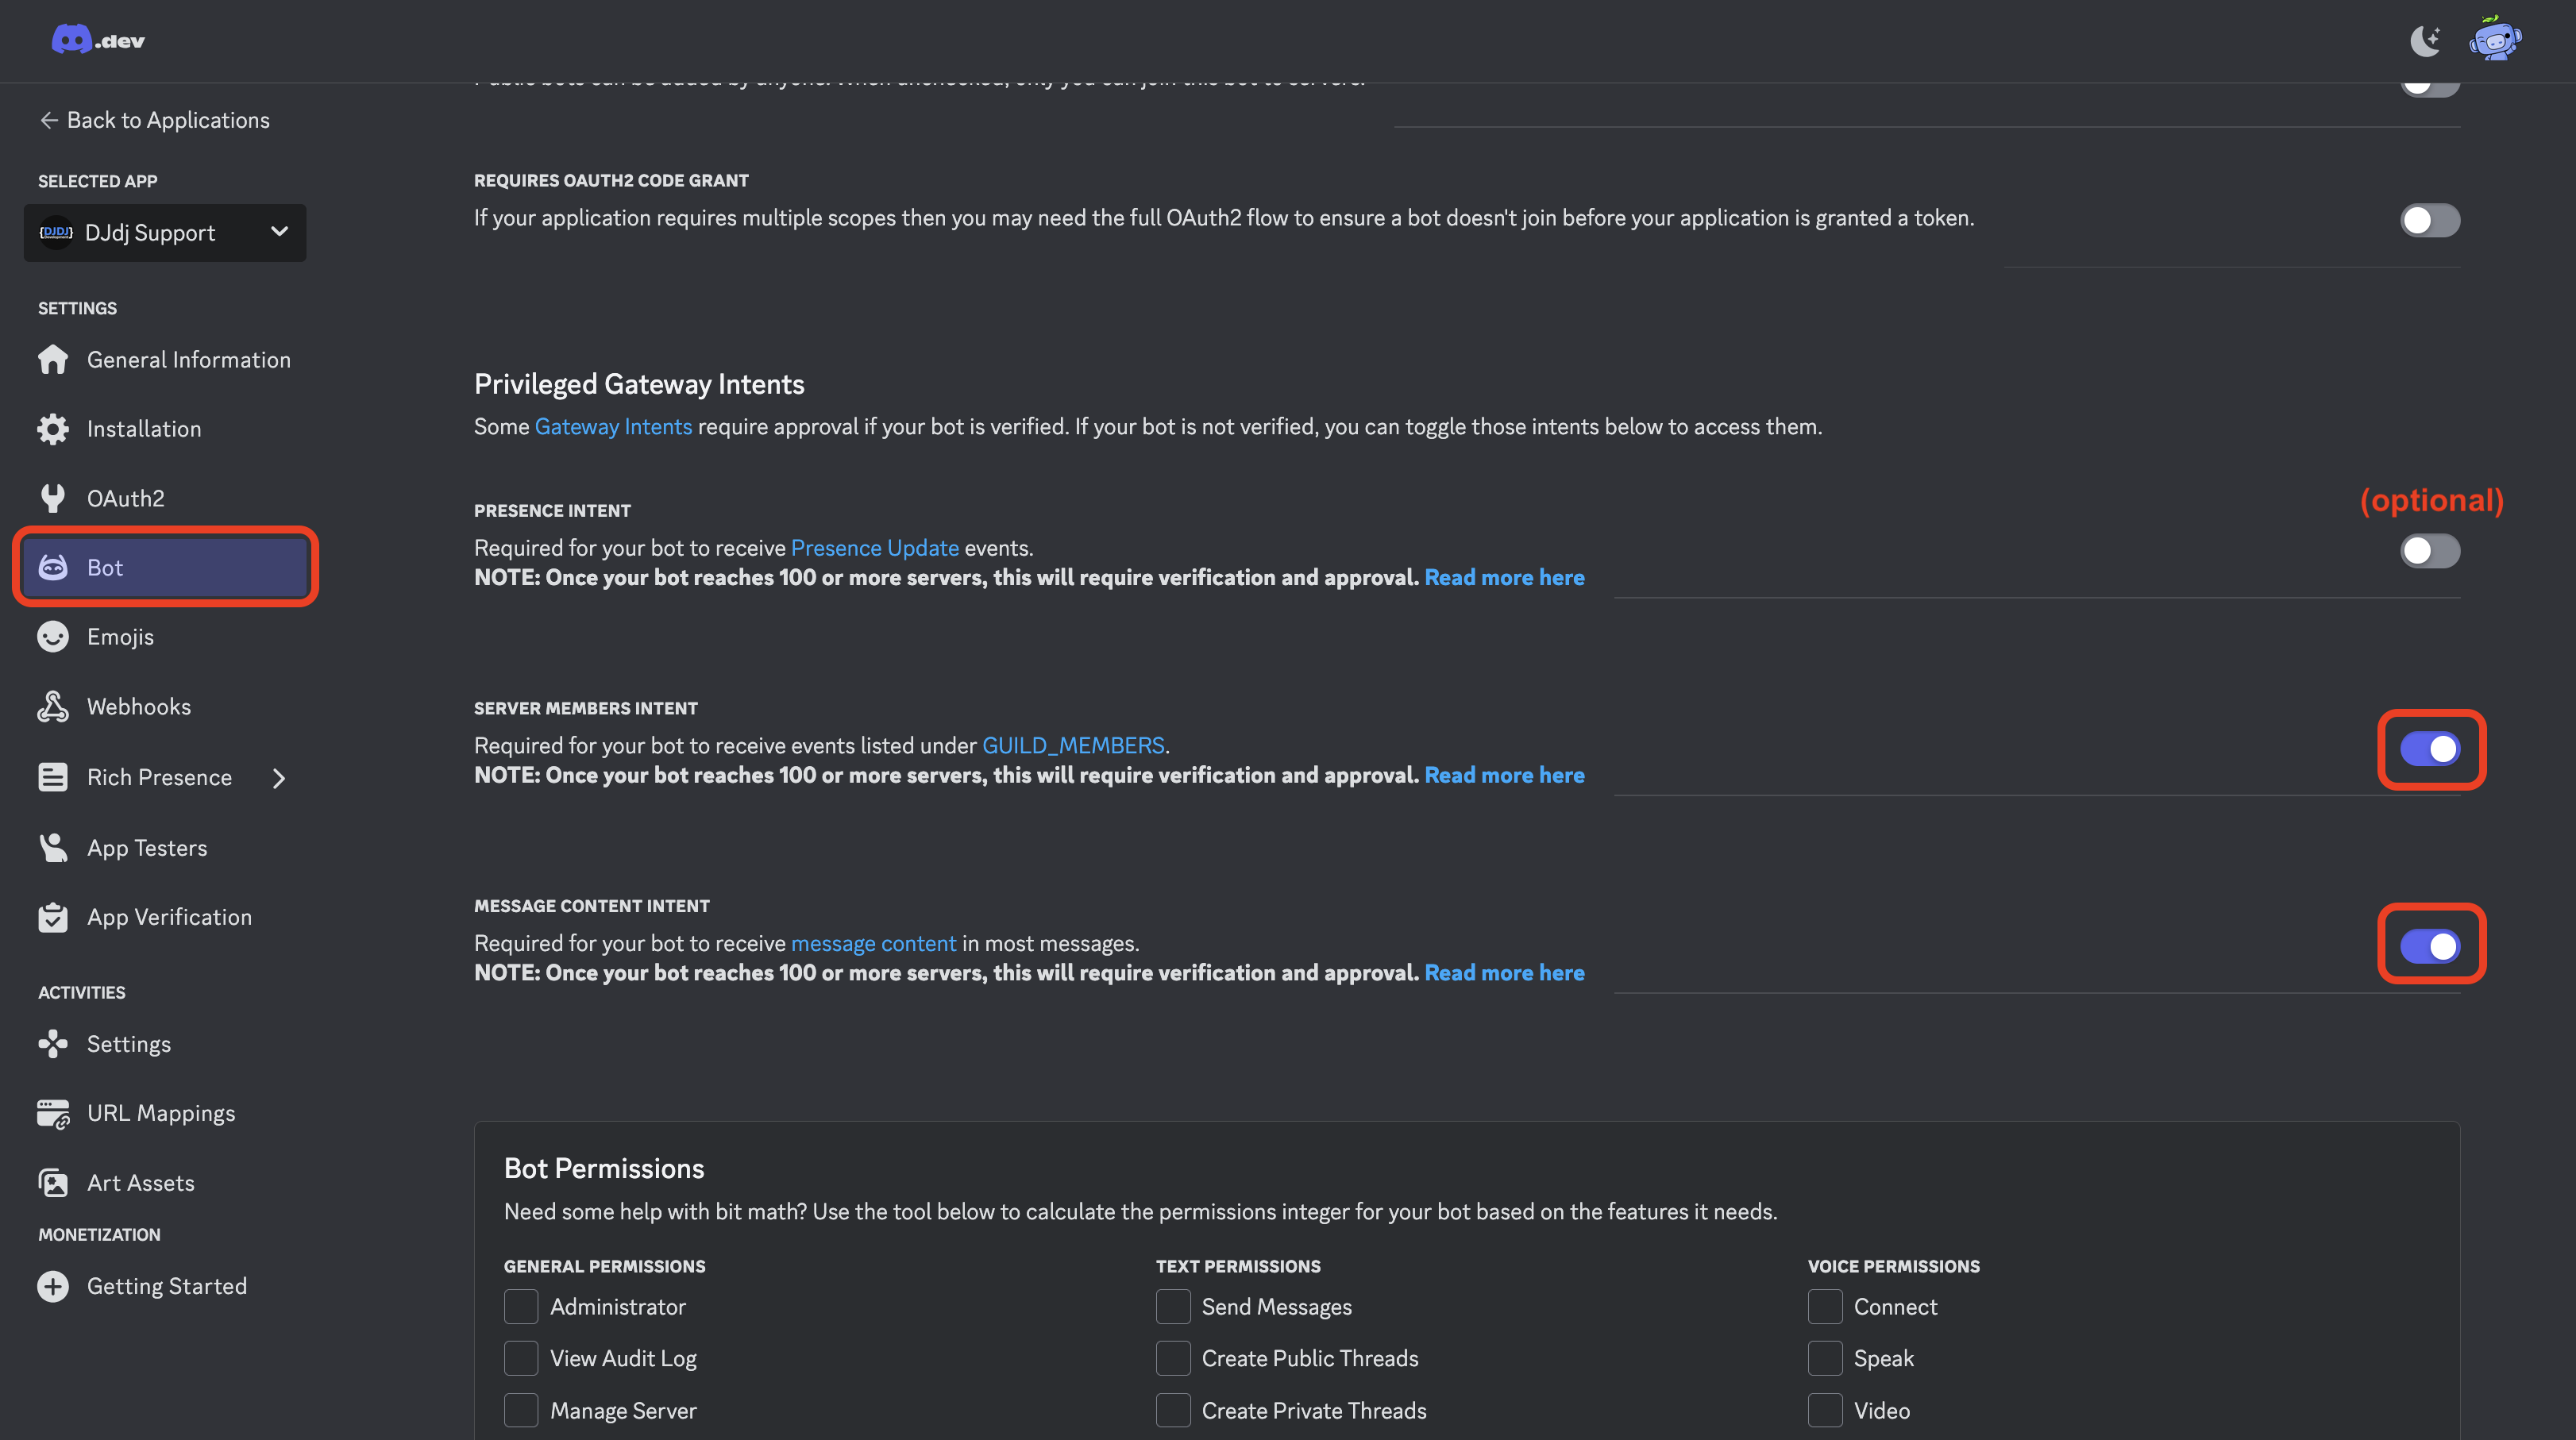
✋ Privileged Intents
Discord requires bots to enable certain intents to access specific data, such as messages and member updates.
Without these, some features of Open Ticket will not work.
- In the Developer Portal, go to your bot’s "Privileged Gateway Intents" section.
- Enable the required intents.
- Save your changes.
Required Intents:
- Message Content Intent (Required for transcripts & text commands)
- Server Members Intent (Required for user management, participants & roles)
- Presence Intent (Optional, only used by plugins)
 Configure the correct Discord Bot intents
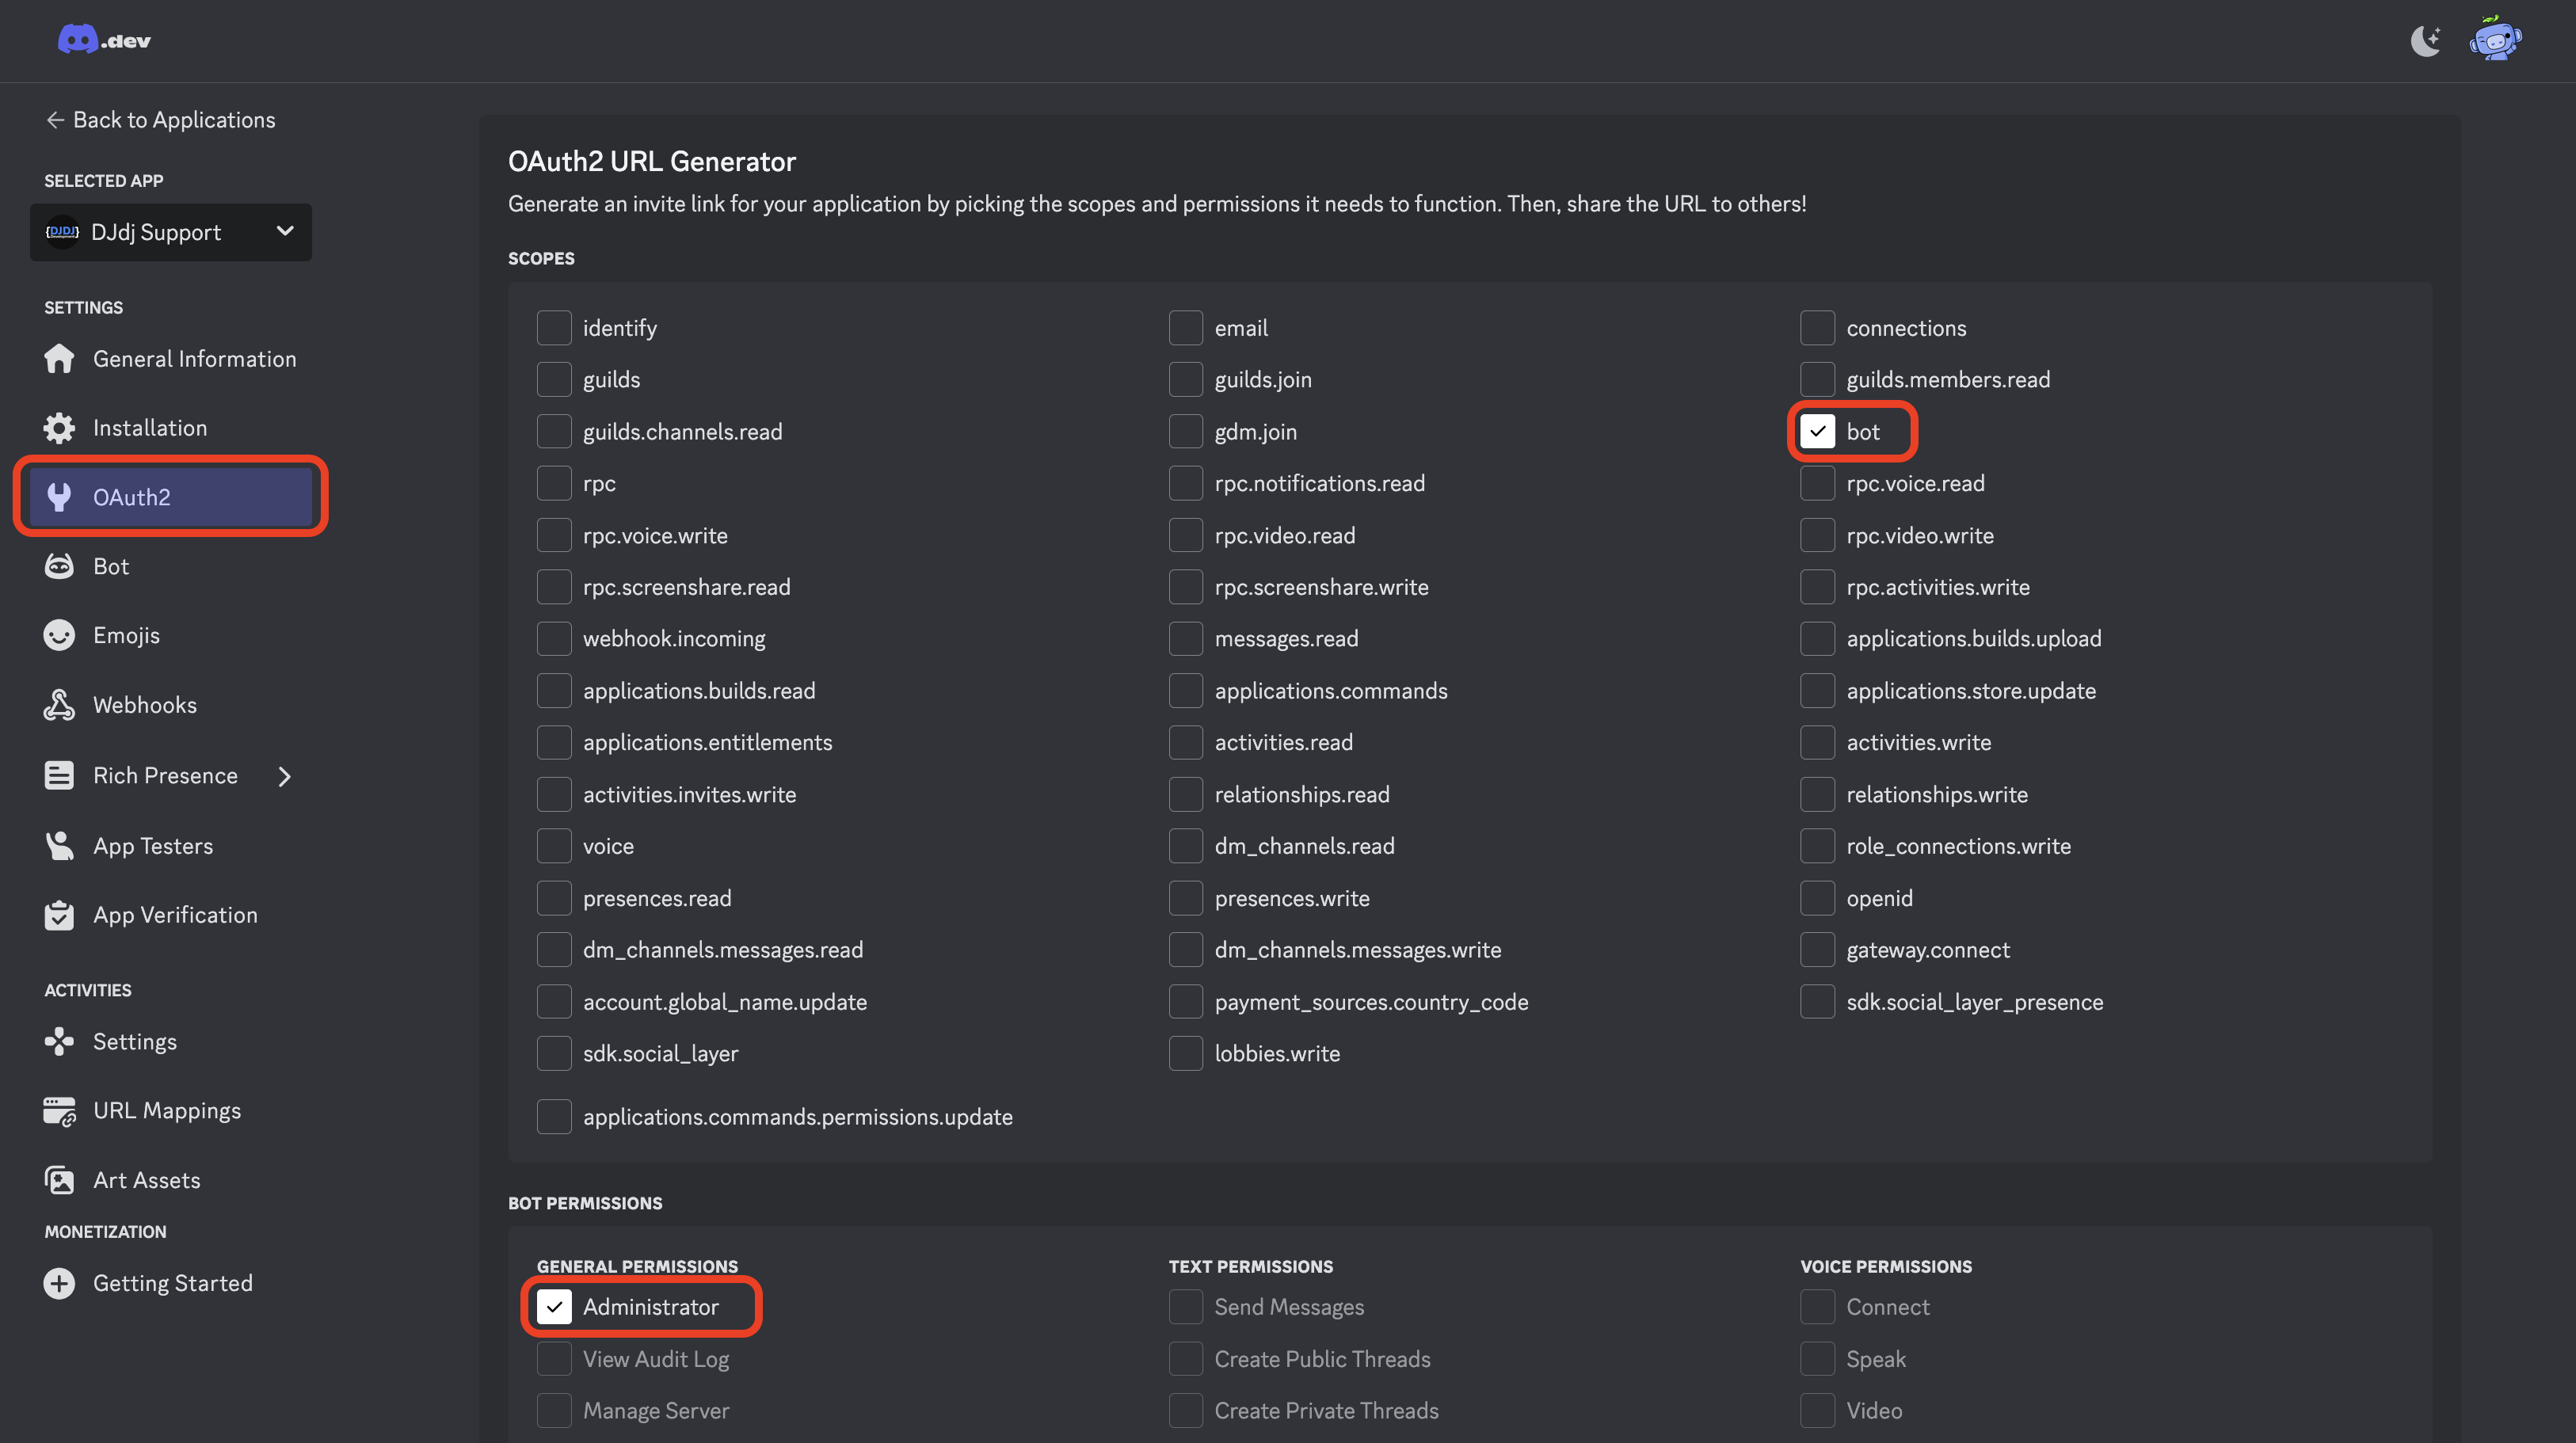
🔐 Bot Permissions
When inviting your bot to your Discord server, you need to grant it sufficient permissions to function properly.
Insufficient permissions could result in weird errors and glitches.
For the best experience, we highly recommend granting your bot the Administrator permission.
This ensures the bot has all the access it needs without running into issues.
If you prefer a more restrictive setup, you can manually configure permissions, but be aware that missing certain permissions might break some features.
Once you've completed these steps, your bot is ready to be added to your server! 🚀
 Configure the correct Discord Bot permissions
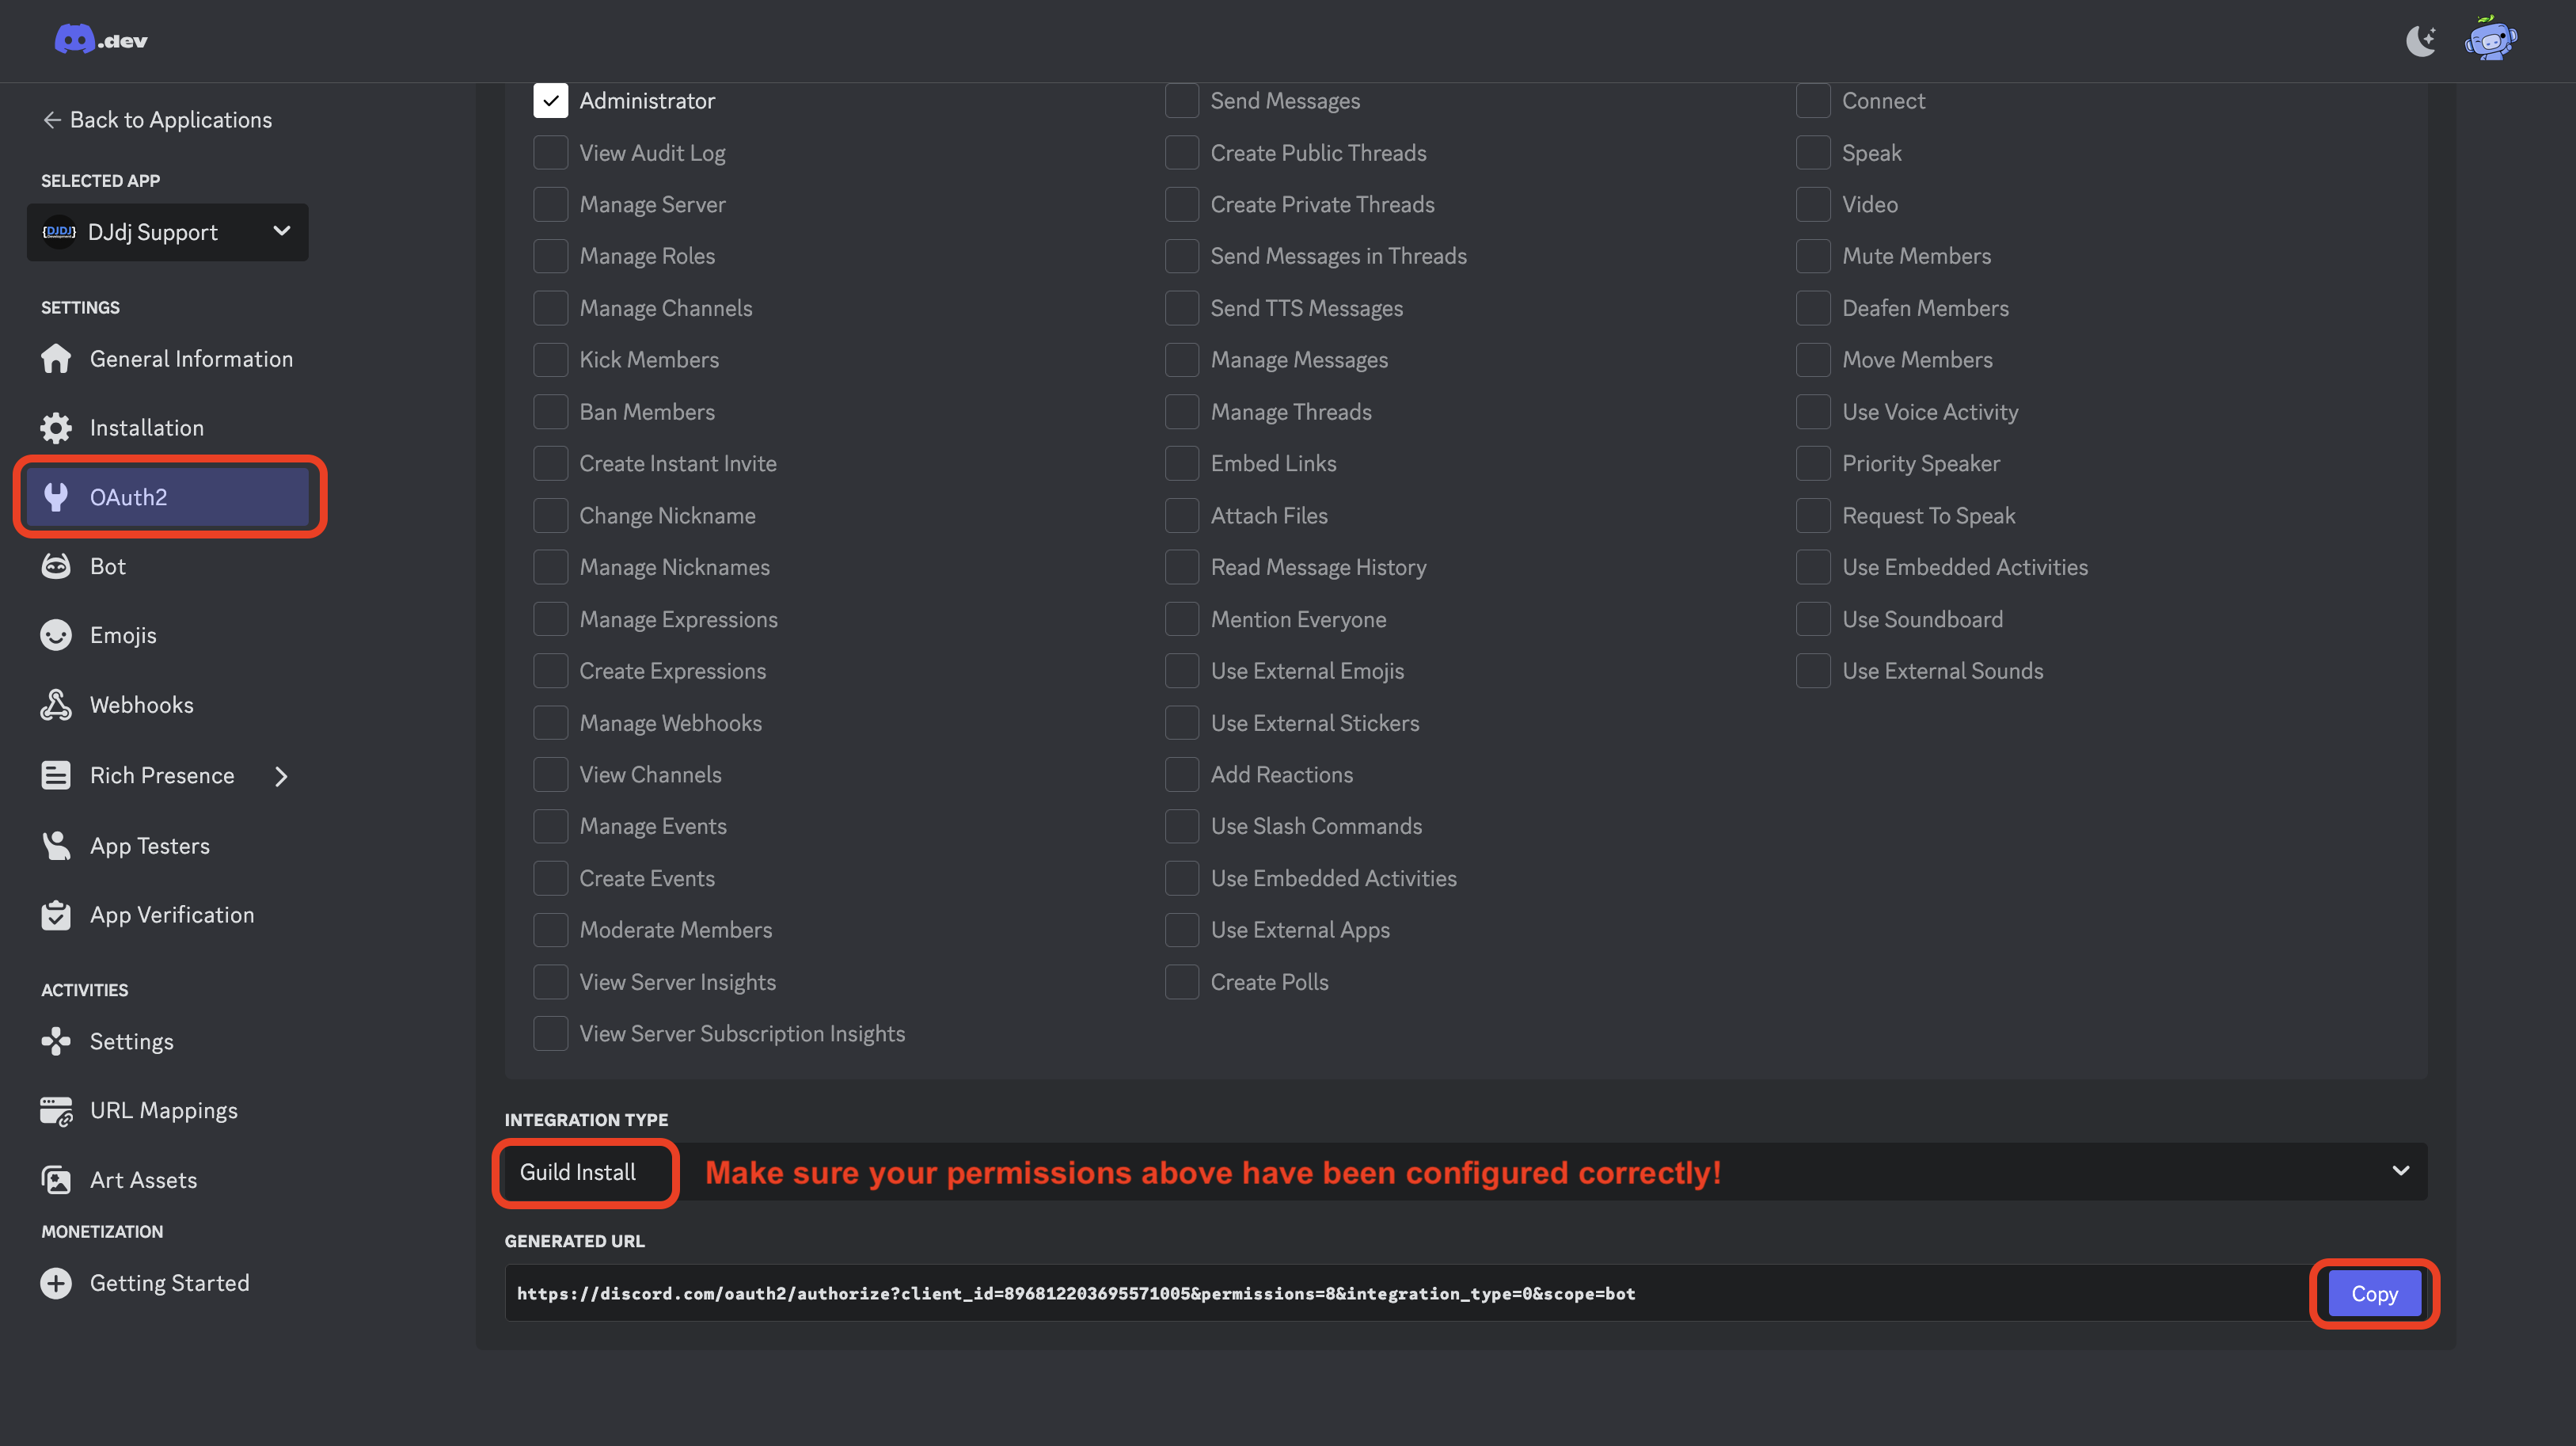
👋 Inviting The Bot
Once your bot is set up, you need to invite it to your Discord server using an OAuth2 URL which can be found below the permissions. Copy the generated invite link and open it in your browser. Select your server and click Authorize.
 Copy the OAuth2 URL of your Discord Bot
Your bot should now appear in your server! 🎉
🏆 Summary
Congratulations! The bot permissions should now configured correctly. 🚀
Here’s what we covered in this guide:
- ✅ Configured Gateway Intents.
- ✅ Configured Permissions.
- ✅ Invited the bot to the server 🎉.
Don't forget to give Open Ticket a star on Github to help us grow!